Saturday, February 4, 2012

Day 5 -Wine

So, since the clue on Day 5 will lead my hunter here...


I knew my clue had to be small.
I just so happened to have the PERFECT thing that will coordinate perfectly right into Day 6. 


I took one of the "bullets" from the nerf gun I got at the dollar store, and hid it in the middle wine bottle.

What I used:
  1.  Wine bottle
  2. "bullet" 
  3. Thread
  4. Needle
  5. Paper
  6. Pen
  7. Measuring tape


Because Will (my seeker) is a big gun person, I wanted to do this properly. So with the help of a dear friend, I was able to come up with the clue. It is simple and it will lead him to his gun room where he keeps all the ammo.


Then I rolled the note up and put it inside my "bullet". 


Now, I wanted my clue to be WELL hidden so what I did was suspend it in the wine bottle so it was hanging behind the front label.


That way it he would actually have to move stuff to see it in there.
                             No freebees in this hunt!


All secure, like it's not even there : ) 


Friday, February 3, 2012

Day 4 - Puzzle


Who wouldn't want to put together a puzzle and find a secret message on the back?
 Exactly. 

Here is the activity I did for the 5th day of the

Needed:

Puzzle
Marker(s)
2 Cutting Boards (optional)


I found this puzzle at the dollar store. 
I didn't think it looked like Star Wars 
but then again I think I've only seen
 PART of ONE of the movies... 
It was the manliest one they had there though so I got it. 


So the first thing I had to do what put the puzzle together. With only 48 pieces it went pretty easy. I decided to put it together on a cutting board so that I could easily flip my puzzle over and write the message on the back. 


After it was all together, 
I put my second cutting board on top of it 
and flipped the whole thing over.


Finally it was time to write the message.


I decided to have the clue on the back lead him here 
for his next clue: 


So I made a little riddle (that he hopefully will have to think about for a while) and then wrote it on the puzzle. 


I purposely wrote it all crooked so that the letters were split between puzzle pieces so when it was all broken up, it couldn't be read. 


Day 4 - Candy

I haven't done anything edible yet in my scavenger hunt so today I am incorporating some chocolatey goodness. I may or may not have already eaten almost half of the package. They are individually wrapped! How could I not?

The Goods:
Construction Paper
Candy
Sandwich Bag
Picture Cutouts
Scissors
Glue
Stapler
Pencil
Stickers (optional)
Cardboard (optional)


First: Cut Outs

You are going to need to find some cutouts that you want for your candies. Make sure they are small enough to fit on the candy. I found these Star Wars ones on google.

Next you will want to cut out your background for your picture  (slightly larger than your picture cutout). It is easiest if you measure the candy and make a template on a piece of cardboard or paper. Then you can just trace it on your construction paper and cut it out.

Second: Glueing


Glue your picture onto its background, and then the background to the candy. Make sure none of the glue can touch the actual candy or seep through the wrapper. 


Then I flipped the candies over and put heart stickers on them so that they had a more "Valentiny" feel. 


Third: Sealing the Deal

To finish up I put the candies (and my next clue) in a baggie. I used the one from my stickers but a sandwich bag would work just fine. Then I closed the top of the bag with some some cardboard that I cut from the puzzle box that I used on Day 5. 


Thursday, February 2, 2012

Day 3

This is one of my less-crafty, more cheesy days. I made a little fire-fighting scene in a box. It will be left in the fire place to be found.


What I used:
  1. Cardboard box (roughly shoe box size)
  2. Firemen 
  3. Glue
  4. Construction Paper
  5. Scissors
  6. Marker


I got all this in one package
 at the dollar store.


This little guy is my favorite : )


First thing I did was cut 2 of the flaps from the bottom of my box and used them to make my building. All I did was fold them and glue them in place. 


Next I cut up a bunch of "fire" and glued it all around my building, similar to the same way I did on Day 2. 

To finish it off I drew some roads on the bottom of the box with a marker, wrote "You" and "Me" on the building (So it would be like our love was on "fire"...haha.)

Finally I overwhelmed the scene with a bunch of my little men to show that even with that many guys, the fire still couldn't be tamed between us (like I said, one of my cheesier days!)


Now, as for the  CLUE...

You will need:

Paper
Pen
Little Car
Foam Heart Sticker (optional)

I asked Will, my scavenger hunt seeker, if he thought the first clue I gave on Day 1 was difficult. He said it was really easy so I told him I was going to make the rest more challenging. He told me to bring it on, so... thats what I'm doing. I make this clue a bit harder.
So here is the note I will be leaving. That is the only hint he is getting this time. 


I will be attaching it to this cute little car (that  I also got at the dollar store) and then placing it "hidden from sight" inside the building from my fire 
scene, as the clue from Day 2 says.


This note will lead him  (if he figures out the clue) to our garage, where the next clue will be hidden under the SPARE tire : )


Wednesday, February 1, 2012

Day 2

For Day 2 of this Valentine's Day Scavenger Hunt I am leaving a note in the mail box. He is expecting it to come WITH our mail so not until the afternoon. I was planning on putting it in there for him to find first thing in the morning but now I'm going to wait.


I made a pop-up card that felt like it took me FOREVER! But that is because I haven't done this stuff since elementary school and with a toddler wanting to help, well that just adds hours.


What you need:


Construction paper
Scissors
Glue
Pen
Ribbon (optional)
Little men (optional)


Step 1: Cutting. First you want to cut your paper to the size card you want it to be. Make sure it is even when you fold it in half. 


Then cut out your fire. 
(That's what fire looks like for non-artsy people
    in case you didn't know.)


Cut out some small thin strips of paper (mine were about 1/2"x 3"). You will need enough for at least one strip per fire cutout. Depending on the size of your fire, you might need more than one to support it. 
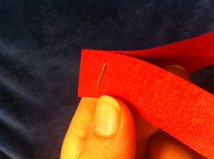


Step 2: Folding

Fold each strip of paper so that it is like a zig-zag. 

I wanted my fire to be attached to the paper on the bottom so it seemed to be coming from the ground up and not just floating so I folded a small ledge at the bottom of my fire so I could glue it down. 


Step 4: Glueing


Glue your fire to your card. Make sure when folded down, it fits inside your card.
Then glue one side of the zig-zag strip to the fire, and the other to the card behind the fire. 
Keep doing this until all your fire is attached to your card.
Wait for everything to completely dry before putting closing it.

Step 5: Message

The last thing I did was write my riddle on some cut-outs that I attempted to make look like smoke (and not like clouds or quote bubbles.) I wrote my message on them, and then attached them to the top of the card using the same steps I did above except with no ledge glued down so they DID look like they were floating. 


Then I took the finished card
And I secured the two little men I had left over from Day 3's project and kept it shut with some black ribbon. 


Tomorrow it shall be put in position in the mail box. 


V-Day Scavenger Hunt

I wanted to share what I am doing this Valentine's Day for my other half. He is really hard to find gifts for so I went a different route and made him a

14-Day Valentine's Scavenger Hunt!

This morning was the first day of it, and so far so good. I got most of my ideas from Pinterest.com which I gathered up on my Valentine's Day board. I mostly just used the pictures for ideas though since most of the ideas didn't exactly fit in with my specific needs or level of craftiness (which is virtually nonexistent.) 

Day 1

SUPER easy! I made a "lovechain" and embedded a secret message in it that gave him his next clue for the hunt.


 I strung in up in his car the night before so when he got up for work it would be waiting for him. It went over the rear view mirror, hung across to the hand grip above the passenger side window, and over the back of the passenger chair, then back again to the rear view mirror. I also left THIS LETTER since it was the first day and I figured I should introduce the game to him so he didn't just throw away my chain. 

Supplies you will need:
Construction Paper
Scissors
Ruler (optional)
Stapler
Pen

Step 1. Cut your construction paper in half "hotdog style." (Is it bad that I feel that is the BEST way to describe it?)  Then cut into strips as illustrated in the image below. 

If you use one inch strips, each piece of paper will make 11 hearts. 

Step 2. Writing the message. It is easier to write the message before you start stapling but I didn't think of that until after I stapled. It can be done either way. 

I used 2 shades of blue paper for my regular hearts and then I mixed in strips of red and on the red is where I wrote the words to my message. 


As you can see... I made my initial STARTing heart solid red so it would stand out. You might want to put an arrow so the person knows what direction to read the message. After that I only used one strip of red in the hearts to put the words on. 

Step 3. Stapling. All you have to do after that is take two strips of paper and staple one end together. 


Then bend the paper back on itself. 
 

This will create the heart look. 
Next staple two more strips of paper to the ends of it to secure the heart shape.


And just keep folding it over on itself and stapling 2 strips at a time to the chain.


(Excuse the poor pictures. I was lazy and used my phone this time.)

If you use this idea, I'd love for you to share how you used it and pictures!